
It’s January and you may be wondering, “What do I do with all the Christmas cards I received this year?” Do I throw them away? Recycle them? Or stack them in a pile on a shelf or box somewhere? Well, I’ve got a perfect solution for you! After all, our family and friends go through a lot of effort to design, buy, and send out those cards every year! I really look forward to receiving them and now have a great way to preserve them for years to come. By the way, this idea can also work great for greeting cards of all types — birthdays, Valentine’s Day, Easter, Baptism, or anything!
In my previous blog post, Creative Ways to Save and Repurpose Your Christmas Cards, I highlighted 10 different ways to save your cards or reuse them to make something new! I like to find ways to repurpose old items in order to keep them out of landfills and reduce, reuse and recycle whenever possible. This DIY project reuses a couple items that might be cluttering your home and transforms them into something that you can keep and cherish year after year. Today, I’ll show you how to make item #5 on my 10 IDEAS TO SAVE AND REUSE YOUR CARDS list.
Item #5: Hardcover Christmas Card Book
Supplies needed:
- Christmas photo cards
- Vintage or old hardcover book (one that you no longer use or need)
- Exacto knife
- Metal straight edge
- Cutting mat
- Scrapbook paper (to coordinate with hardcover book)
- Spray adhesive
- 1/4″ eyelet set and hammer
- Heavy duty 1/4″ hole punch or drill
- template for punching holes
- 1″ or larger binder rings
- Standard hole punch
Instructions:
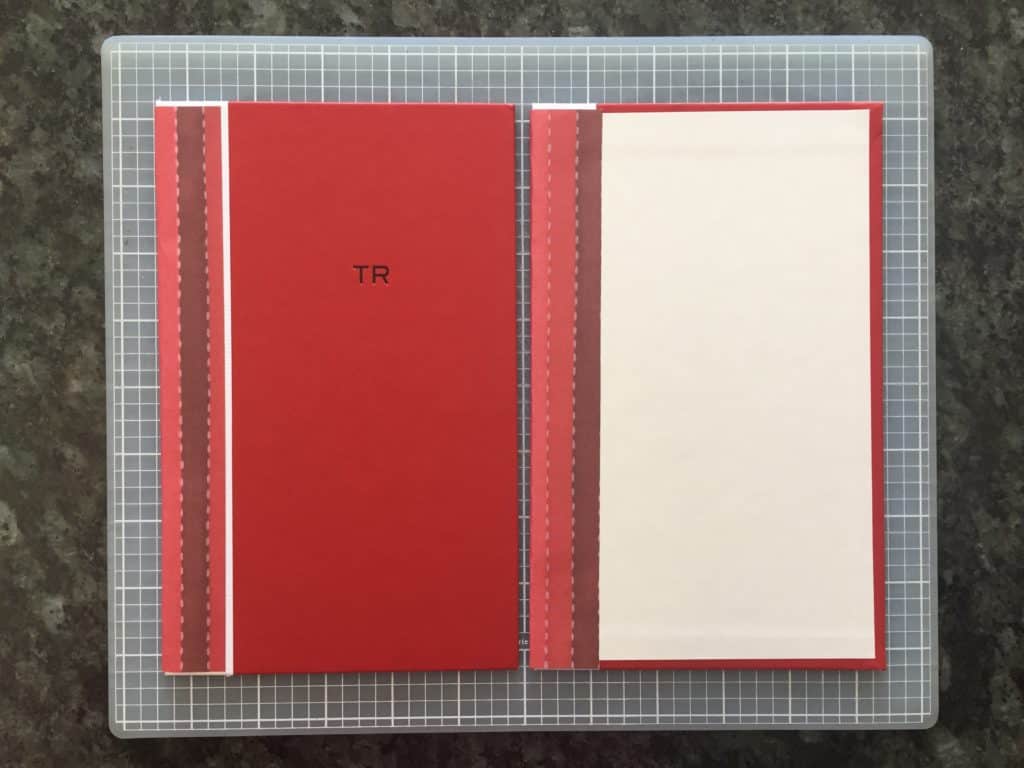
First, determine which hardcover book that you’d like to use for this keepsake book. I chose one that had a red cover since I intend use it for Christmas cards. Match your book to your theme, holiday or event, if possible. Also, gather your Exacto knife, metal straight edge, and cutting mat.

Second, carefully cut the spine and book pages from the front and back cover. Do your best to cut a nice clean line as this will be noticeable on your finished project.


Next, cut your scrapbook paper to the desired size to wrap around the unfinished edge of you covers. Leave enough width to be able to glue the paper securely to the book cover. Once cut to the correct size, bend the paper around the spine in the correct position. Then spray the adhesive on the inside of the paper (I sprayed on top of cardboard to protect my surroundings) and glue to the cover. Repeat for back cover too. I recommend stacking a couple books on top and letting it dry for an hour to ensure a good bond.

Then, using your template, trace the 3 holes in the cover where you will be punching through for the eyelets. Make sure you line up the front and back covers so that the binder rings and cards are aligned in a neat stack when complete. Punch three 1/4″ holes using a heavy duty hole punch. You can use a drill, but the holes will be cleaner with the heavy duty hole punch. Next, insert the 1/4″ eyelets using an eyelet setting tool and hammer.


When all six eyelets have been set, you can punch the holes into the photo cards or greeting cards. Use the same template and a standard hole punch. You can usually punch through 2 – 3 cards at a time, depending on the thickness of each.

Next, insert all the cards and binder rings to finish the Christmas card book. The nice thing is that you can add dividers between the years and add more cards to the book next year! Don’t forget to include your own family’s Christmas card.

Finally, you can print out a title for the front cover, if you desire, and use spray adhesive to secure it into place. *Quick tip* – I did this to cover up the original text on the front cover. Voila!

Feel free to ask questions, share ideas and photos with me by leaving a comment below or email me directly at rebekah@simplygreenrebekah.com. I can’t wait to hear from you!